The State of the Map US conference at the United Nations Headquarters is in NYC June 6-8. It’s not too late to sign up to attend! Over the next few weeks we will be highlighting the talks by your friends at Mapzen. You won’t want to miss Patricio Gonzalez Vivo’s Tangram + RaspberryPi Lightning Talk on Sunday June 7 at 3:30 pm in Room CR3.
Open data anywhere for everyone, using OSM data on a RaspberryPi
Make your own GPS device with Tangram ES and RaspberryPi
A couple of months ago the nice folks at RaspberryPi published a blog post about Tangram ES, Mapzen’s native 2D/3D map rendering engine running on their hardware. The feedback was great and people seemed to be very excited to start using it for their own projects.
Tangram ES is a work-in-progress map engine written in C++ and OpenGL ES 2.0, so it can be a little intimidating to start from scratch. That’s why we thought this small weekend project could get the ball rolling and ignite some ideas in the community.
In this github repository you will find:
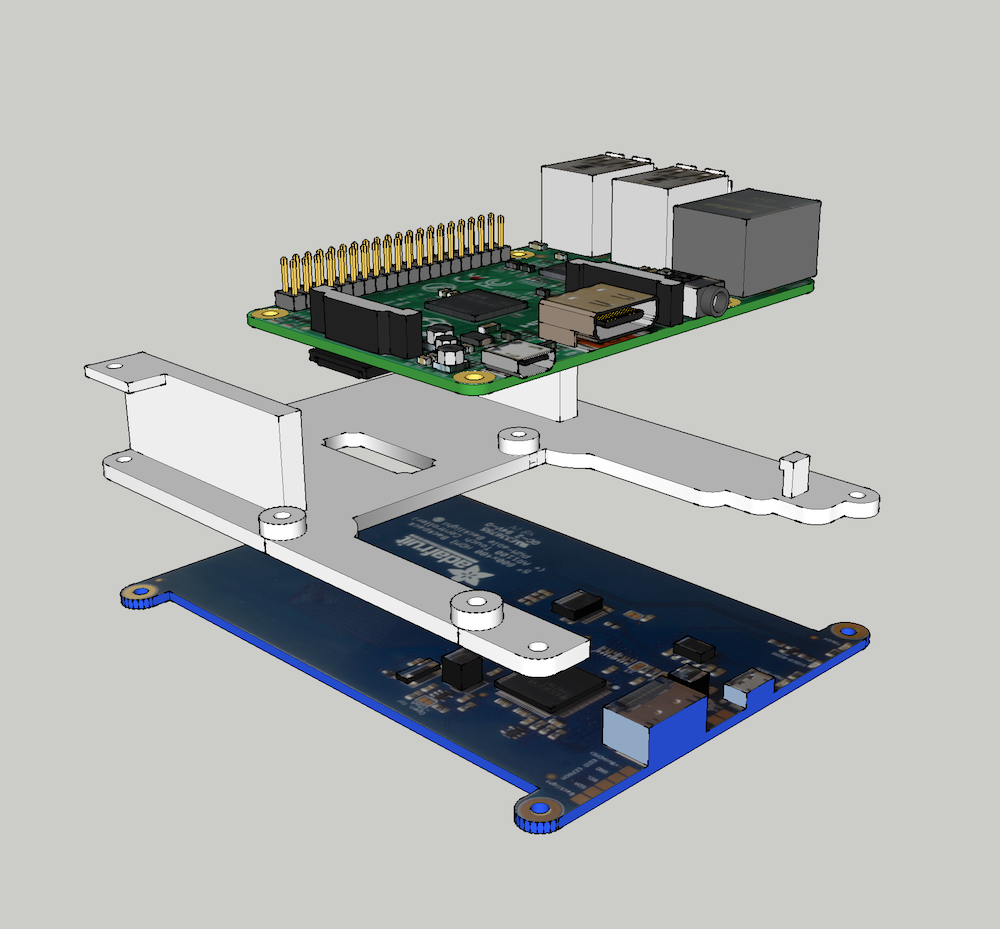
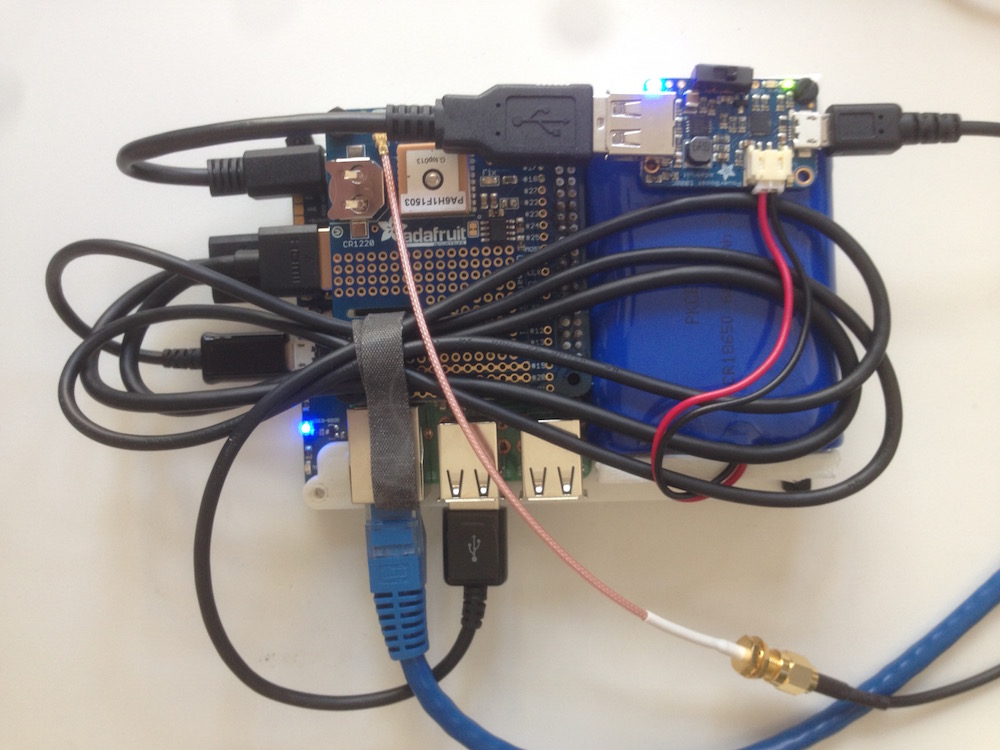
A 3D-printable model to mount together a RaspberryPi A+/B+, Adafruit’s touch HDMI 5’’ 800x480 , Ultimate GPS Raspberry PI HAT, Lithium Ion Battery and PowerBoost 1000 Charger.
Source code to run Tangram ES with a nice little graphical interface to move, rotate and zoom a map with a touch-only screen.
Instructions for configuring Tangram ES to load tiles locally, using data for your own city or region.
Hardware
Besides your RaspberryPi I’m using the following components to make a stand alone device:
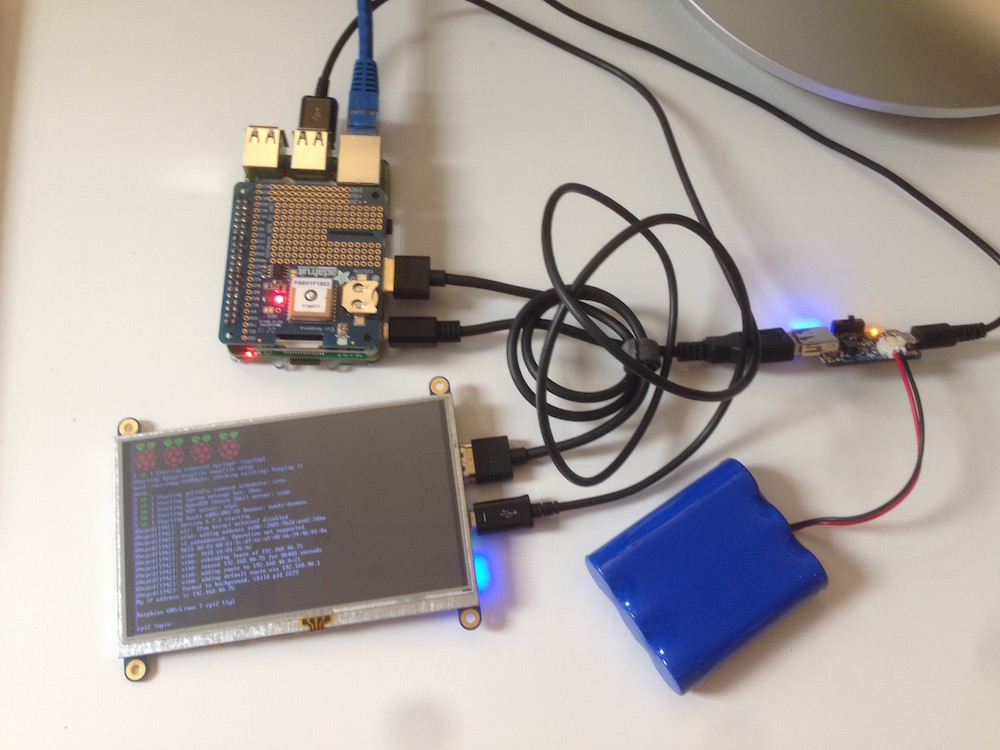
These are held together with the 3D-printed mounting station defined in this file: parts/rpi-screen-mount.stl
Once you put everything together, it should look something like this:
Compile and install Tangram ES with a nice UI for RaspberryPi
Now let’s jump into the code of this project.
First we need to clone this repository in your raspberryPi and install some dependences to compile everything.
sudo apt-get update
sudo apt-get install cmake libcurl4-openssl-dev g++-4.8
cd ~
git clone https://github.com/tangrams/PI-GPS.git
cd PI-GPS
git submodule update --init --recursive
mkdir build
Then, just to make sure it is working, compile tangram and then run it.
export CXX=/usr/bin/g++-4.8
cd build
cmake ..
make
cd bin
./pi-gps -m
Note: we are running tangram with the -m flag to display the mouse.
Configure Tangram ES to fetch tiles locally
Getting fast internet access to your RaspberryPi could be a problem, especially if you are planning to use this GPS device on your bicycle. Let’s see what you need to do to download the map tiles locally making your map network-independent.
We installed Tangram ES and tested it in the previous section. Now it is time for us to make some changes so Tangram ES will search for local files instead of fetching them from a server. Lucky for us, we just need to change that in the configuration YAML file. As with the web version of Tangram, this engine is super flexible and you can customize most of it from this file.
Go and open the ~/PI-GPS/tangram-es/core/resources/config.yaml file, and edit the following line:
sources:
    osm:
        type: MVT
        url:  http://vector.mapzen.com/osm/all/{z}/{x}/{y}.mvt
So it looks like:
sources:
    osm:
        type: GeoJSONTiles
        url:  file:///home/pi/PI-GPS/build/bin/tiles/{z}-{x}-{y}.json
With these changes, tangram will search for tiles inside the tiles/ directory.
Get the tiles of a town/city/region from OpenStreetMap
My colleague and friend Peter Richardson made this useful set of python scripts for downloading tiles locally at the repo called Landgrab.
Let’s start by downloading some dependencies for this script.
sudo apt-get update
sudo apt-get install wget python-pip
sudo pip install requests
Then download Peter’s script in the directory where tangram was compiled:
cd ~/PI-GPS/build/bin
wget https://raw.githubusercontent.com/tangrams/landgrab/master/landgrab.py
Now is the time to download some vector tiles. For that we need the OpenStreetMap ID of the place we want to download. Go to OpenStreetMap Website and search for a location and check its ID (the number between brackets).
For example:
- Buenos Aires (1224652)
- London (65606)
- Manhattan (3954665)
- New York City (175905)
- Paris (7444)
- Rio de Janeiro (2697338)
- Rome (41485)
- Sydney (13766899)
- Tokyo (4479121)
- Tucson (253824)
Note: To change the initial coordinates of the map, open ~/PI-GPS/tangram-es/core/resources/config.yaml again and add a line to the camera block so that it looks like this:
cameras:
    camera1:
        position: [-74.00976, 40.705327]
        type: perspective
Substitute your own longitude and latitude in the position values. Once we choose a place, tangram will start fetching the vector tiles that we will need. For that we will use the python script we downloaded with the given OSM ID and the zoom level we are interested (in our case all of them are from 1 to 18).
python landgrab.py 3954665 1-18
This may take a while. Go get a coffee.
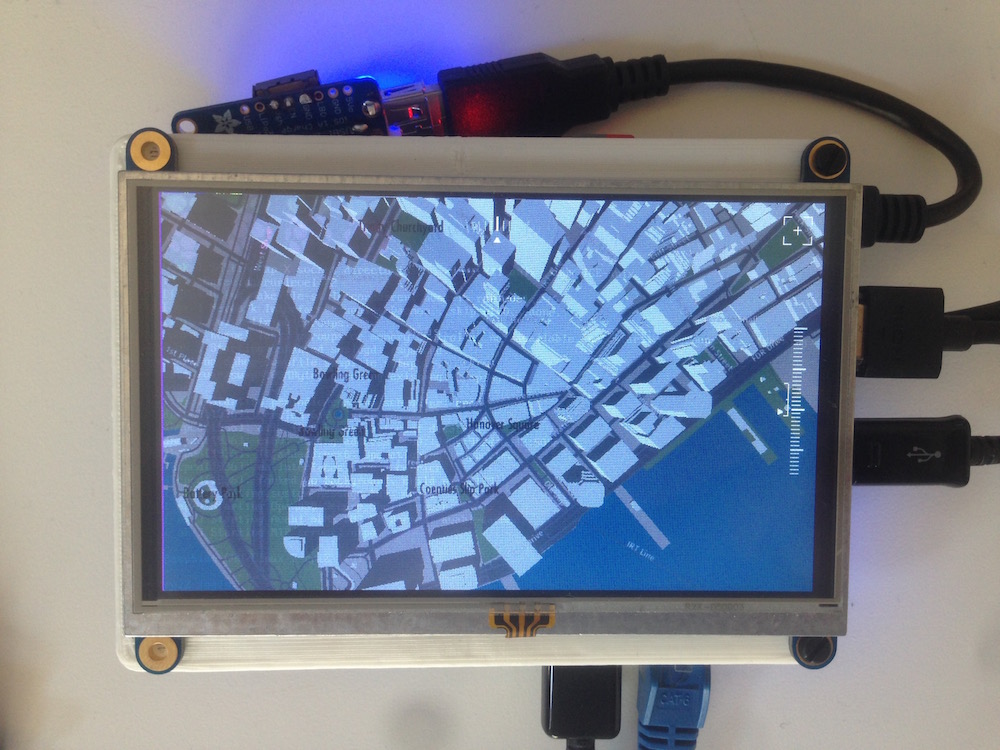
Finally! Run it and enjoy your 3D map!
Well done! Everything is ready, unplug your internet connection and run tangram on your RaspberryPi!
cd ~/PI-GPS/build/bin
./pi-gps -m
I hope you are excited about all the possibilities of having cool 3D maps on your projects. Send us your opinions, feedback or photos of your work!
Patricio is an engineer and artist making beautiful open source mapping tools at Mapzen. He also teaches in the MFA Design & Technology program at Parsons The New School, and is writing The Book of Shaders, a gentle step-by-step guide to Fragment Shaders. In a previous life he was a psychotherapist and expressive art therapist.